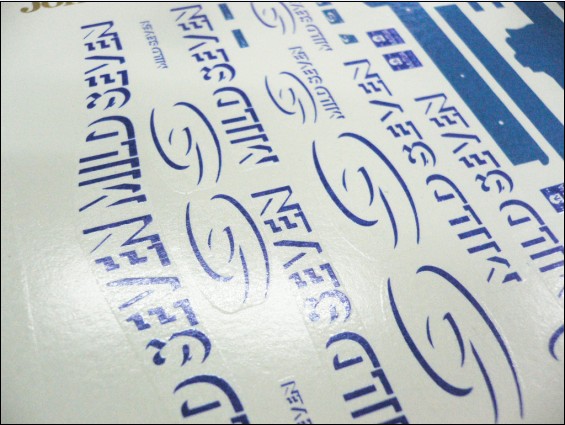
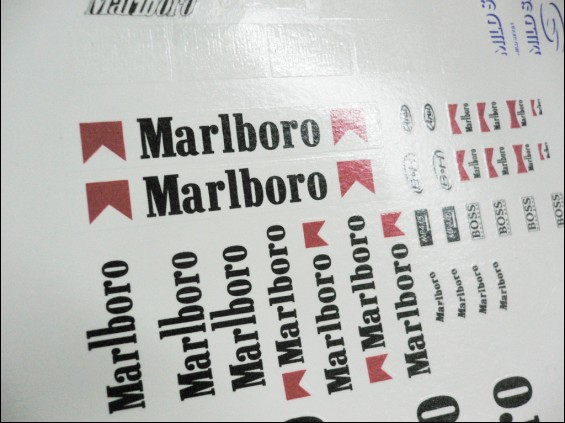
Water slide decals (or slip
decals) are water-mounted decals generally
printed face up and rely on the dextrose corn
sugar residue from the decal paper to bond the decal transfer to a surface. A
water-based adhesive layer can be added to the decal to create a stronger bond
or may be placed between layers of lacquer to
create a durable decal transfer. The paper also has a layer of glucose film
added prior to the dextrose layer which give it the adhesion properties, the
Dextrose layer give the decal (lubricity) the ability to slide off the paper
and onto the substrate.

Water slide decals are thinner
than many other decorative techniques (such as vinyl stickers)
and as they are printed, they can be produced to a very high level of detail. As such,
they are popular in craft areas such as scale modeling, as well
as for labeling DIY electronics
devices, such as guitar pedals.
Until recently, water slide
decals were professionally printed and only available in supplied designs, but
with the advent of printable decal paper for colour inkjet and laser printers, custom
decals can now be produced by the hobbyist or small business. Even without
this, decals have been made at home by modellers. Gummed paper tape was used as
a base and adhesive, with layers of hair spray (a shellac varnish)
built-up to form the transparent layer. The difficulty with this in the 1970s
was in printing the coloured image neatly by hand, as this pre-dated accessible
computer printing.
How to Apply UV decals /
Waterslide Decals with Alps Printer
Introduction
This article gives
general information about waterslide decals and a step-by-step guide showing
how decal printer,
waterslide decal printer, decal printing(with Alps printers) should be applied.
Background
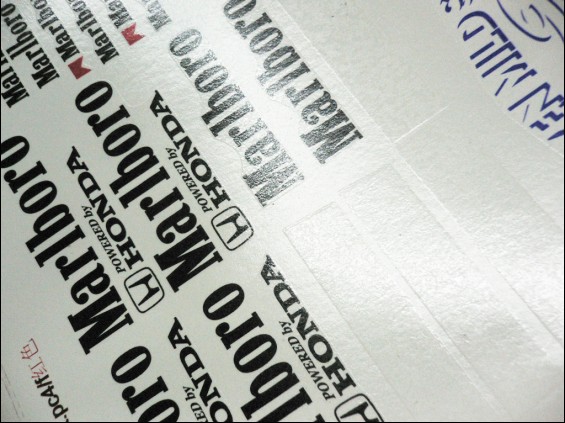
Waterslide
decals are by far the most popular way of applying unit markings and other
graphics to scale models. This is partly because most model kits are
supplied with appropriate waterslide decals, but also because they generally
work very well in most situations and it is relatively easy to get a good
result.
Waterslide
decals can vary considerably in quality. Sometimes they are too thick and
will stick out on the surface of the model and will not lie flat over surface
details. At other times, they may be too thin and might disintegrate during
the application process. If the decals printing is not sufficiently
opaque the underlying colour of the model will show through.
Occasionally, they may be printed out of register where the different colours
are not printed over each other in the right place. However, standards
have been continually increased over the years and the vast majority of decals
are now very good quality.
Decals
printing that are applied well will greatly enhance a model, but when they are
applied badly they will ruin a model that otherwise would have been
excellent. Providing a few basic rules are followed, it is quite easy to
get good results.
Description of Water
Slide Decals
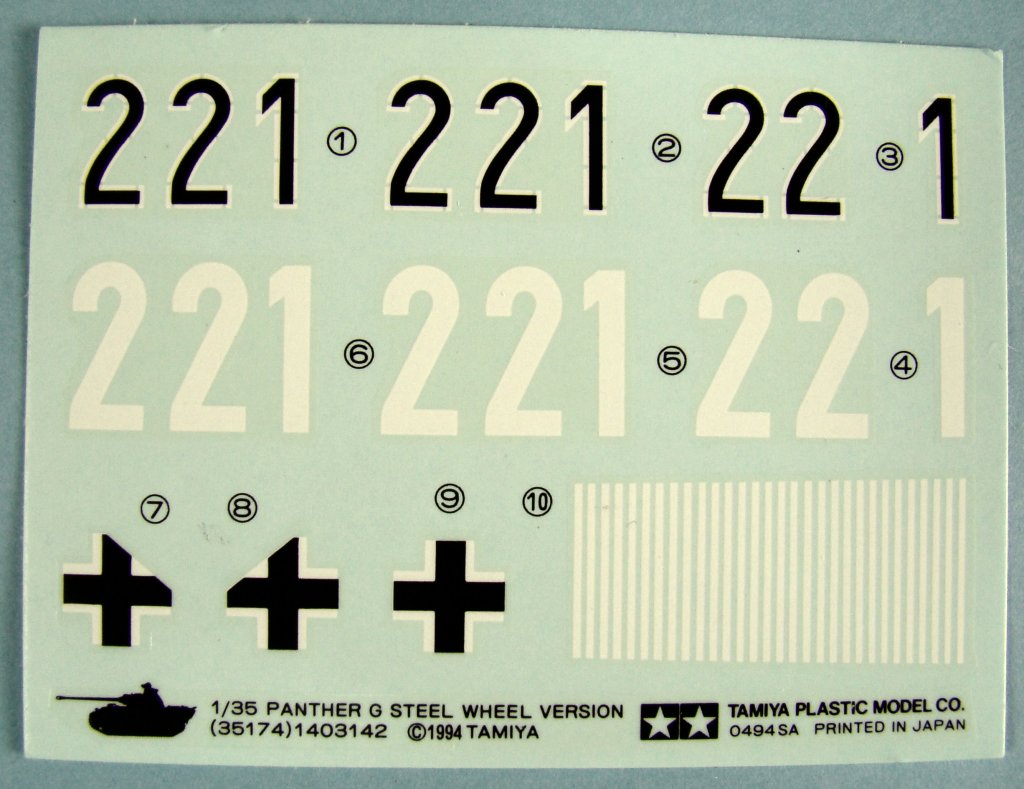 Decals for armoured vehicles are often
restrained. Some AFVs have few markings.
Decals for armoured vehicles are often
restrained. Some AFVs have few markings.
Water
slide decals or transfers consist of several layers. There is always a
sheet of backing paper to which everything else is attached. On top of
the paper is a layer of water soluable glue. The actual markings are
printed on the glue film and on top of that is a carrier film.
When
placed in water for a few seconds the glue will become slippery and allow the
decal to literally slide off the backing paper and on to the model. A
single spot of dishwashing liquid dissolved in the water will help the decals
to slide of the backing paper and on to the model. Hopefully there will
still be sufficient adhesive on the back of the decal to stick to the model.
Surface preparation
It is
vitally important to have a gloss or semi-gloss surface to apply the
decals. If the model is painted with matt/flat paints, then the surface
needs to have a couple of thin coats of gloss varnish, or Klear/Future to give
it some shine.
Matt/flat
paints leave a surface that is microscopically rough. If a decal is
applied to such a surface then it will only make contact with the high points
on the surface of the paint. When dry there will be thousands of
microscopic air pockets under the decal which will appear as 'silvering' and
will look terrible.
Some
modellers will only varnish those parts of the model where decals are to be
placed, but there is a danger of producing a ridge at the edge of the
varnish. Most modellers will varnish the entire model because this is not
only needed for decal application, but also makes it easier to apply filters
and washes to the model.
The
model can always be returned to a matt or semi-gloss finish after decal
application with another coat of appropriate varnish.
Decal Solutions
Although
waterslide decals are intended to stick well to the model, in practice they
only do this in ideal circumstances, such as when there is a perfectly flat
surface. If the surface undulates or has texture, of if the decals need
to fit over or around surface projections, then they need a little help.
Many
companies produce two part decal solutions to help with the application of
waterslide decals. The first part is painted on to the surface of the
model. This makes it easier to slide the decal into the correct position
and improves the adhesion of the decal. The second part is painted on top
of the decal. This softens the decal and helps to make it conform to any
irregularities in the surface. This second solution can be reapplied if
the decal has not fitted well around any surface projections.
Once
the second solution has been applied, the decal may appear to wrinkle and may
look dreadful. However, do not touch it at this stage because it will
be extremely elastic and fragile. As it dries the wrinkles should
disappear and the decal will shrink back on to the surface and cling fast to
any surface details.
These
decal solutions vary in strength between different manufacturers. It is
advisable to experiment a little when you use these solutions for the first
time, or change brands.
When To Apply Decals
This
will vary from model to model and it may be advisable to apply some decals at a
different time to others. Normally, the best time to apply them is just
before weathering, so that they look like they have been weathered with the
rest of the vehicle.
Decals printing are commonly
used on hot rod automobiles and plastic models. They are also used on guitars
as a way of personalizing them.
Decals printing are
great to stick onto backpacks, car windows, skateboards, folders and car
bumpers. Decals can show your views on political matters and your thoughts on
environmental concerns. Decals can allow you to express ideas to the world
without the need for words, displaying pictures and graphics that generate an
emotion or feeling in the observer. You can create your own original decals design
with the use of an easy to operate computer program,
and use the Alps printer that the best decal printer.
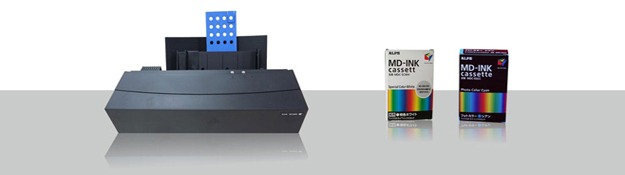
Models Printer
applied type:
1.decal printer
2. waterslide decal
printer
3. white color printer
4. gold color printer
5. silver color printer
6. metallic color
printer
Directly print Gold color and Silver color designs includes
photos, decals design,words and texts by alps printers.
The most important is that it can print Gold color ,white color,
metallic color and Silver color on decal stickers.
Gold ink and Silver color ink directly print on stickers.
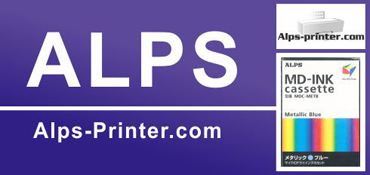
Process Metallic Color System™
The Process Metallic Color printing enables printers to
consistently and reliably print CMYK process metallic colors and special
effects using their existing equipment and print workflows.
Until now, four-color printing incorporating metallic inks
or metallic substrates was expensive and unpredictable - particularly if more
than one metallic color was required. But the Process Metallic Color System has
changed all this. Now, with only five inks, a single print run can consistently
and predictably produce as many as 250 different metallic colors at a fraction
of the previous cost. The Color-Logic system enables graphic designers to
create a single metallic design that can be executed using offset lithography,
flexography, inkjet and digital processes.
Printing on paper or decal stickers only needs 30 seconds.
Step By Step Guide
The
following shows the application of a decal to Tamiya's 1/35th M113 armoured
personnel carrier. The first stage is to prepare your work area and make
sure you have everything to hand:
Model
Decal sheet
Saucer of water + a drop of dishwashing liquid
Tweezers
Decal solutions
Small brushes (one for each decal solution)
Small scissors
Paper towel
Further Hints
1.
If the decal is thin and the paint underneath shows through
(often the case with white decals) then try painting
over the decals with thinned paint using them as a template.
2.
If the decals have to fit around surface projections, then cut
them into small pieces and apply them separately.
3.
If there are air bubble under a decal when it has dried then
prick it with a pin a few times, paint decal solution on it and press down on
it with a damp paper towel.